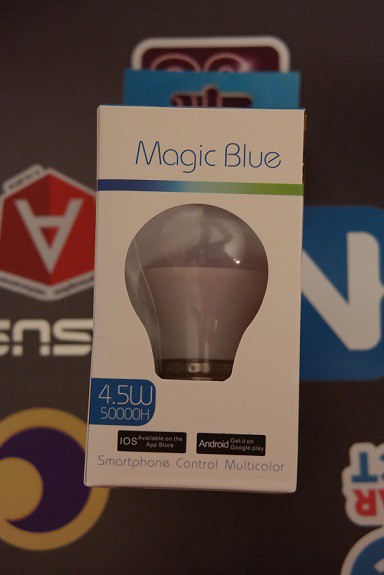
Since one of the awesome things I got from AngularConnect was a Magic Blue smart light bulb and NativeScript looks like an interesting framework, I’ve decided to create a small mobile app to interact with it.
NativeScript is an open source framework for building native mobile applications, using web technologies, and it works with the latest version of Angular.
I’ll go through setting up the environment, creating a new template application, a basic component and interacting with the light bulb.
Environment
First you need to setup everything, before we actually get to write any code. You start with Node.js, which if you don’t have already you can go to nodejs.org and grab it.
Second you need to install the NativeScript CLI:
npm install -g nativescriptSince it will build native Android or iOS apps you also need to setup the platform for each of them, things like Android SDK, Xcode, etc. I suggest you manually set them up, or you can go to the quick setup part in the NativeScript docs which have some ready made scripts that should do everything.
Finally you can check that everything works using the NativeScript CLI doctor:
tns doctorIf you run into trouble or want more information about the setup, the official docs are quite helpful.
New application
Creating a new application is easy enough, with the help of NativeScript CLI. Create a new application template with:
tns create NativeScriptLightBulb --ngThe first parameter is the application name, and with the second one you’re specifying that we want to use Angular. You can also create applications without Angular, and they will use JavaScript/TypeScript only with the provided SDK.
Second you need to add a new platform to the application, iOS or Android:
tns platform add ios

tns platform add android
At this point you can build and start the application in the emulator or on a real connected device:
tns run android --emulatorOr, if you want to have a live sync kind of flow:
tns livesync android --emulator --watchThis will watch all the files in the solution, build and redeploy the application on each change. Similar to modern web development workflows.
Creating the first component
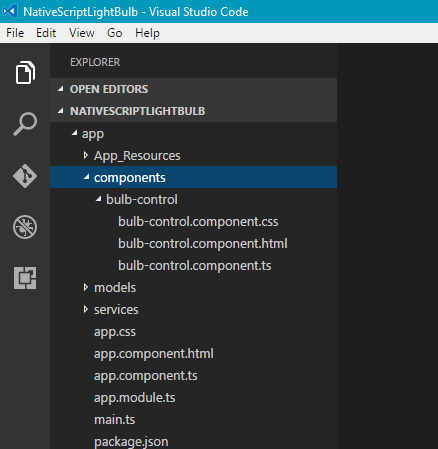
You can start by creating a simple Angular component, with the accompanying template and style files. For a better project structure add all of them into a components/bulb-control folder.
The project structure should look similar to this:
Then create a class and add the component decorator:
| import { Component } from '@angular/core'; | |
| @Component({ | |
| moduleId: module.id, | |
| selector: 'ns-bulb-control', | |
| templateUrl: 'bulb-control.component.html', | |
| styleUrls: ['bulb-control.component.css'] | |
| }) | |
| export class BulbControlComponent { | |
| maxValue = 255; | |
| minValue = 0; | |
| redValue = 128; | |
| greenValue = 0; | |
| blueValue = 0; | |
| whiteValue = 0; | |
| updateLightBulb() { | |
| console.log('Update color'); | |
| } | |
| connectToMagicBlue() { | |
| console.log('Connecting to device'); | |
| } | |
| } |
Beside the boilerplate code, there is one method that will eventually update the light bulb color, a method to connect to the light bulb, a set of properties that will be used to bind the color model (red, green, blue, warm white) and some minimum and maximum values for a color. I’ll create the template for this model shortly.
NativeScript uses Angular, but it doesn’t work with a browser, so you won’t be able to use elements like *div *or *h1. *Instead NativeScript provides us a custom made collection of elements that one can use, and each of these elements will be translated into a native Android or iOS UI component.
Adding some basic controls for a simple UI, that can be used to control the color of the light bulb, is all that’s needed.
| <StackLayout> | |
| <Label text="Magic Blue"></Label> | |
| <Button (tap)="connectToMagicBlue()" | |
| text="Connect"> | |
| </Button> | |
| <Slider [minValue]="minValue" | |
| [maxValue]="maxValue" | |
| [(ngModel)]="redValue"> | |
| </Slider> | |
| <Slider [minValue]="minValue" | |
| [maxValue]="maxValue" | |
| [(ngModel)]="greenValue"> | |
| </Slider> | |
| <Slider [minValue]="minValue" | |
| [maxValue]="maxValue" | |
| [(ngModel)]="blueValue"> | |
| </Slider> | |
| <Slider [minValue]="minValue" | |
| [maxValue]="maxValue" | |
| [(ngModel)]="whiteValue"> | |
| </Slider> | |
| <Button (tap)="updateLightBulb()" | |
| text="Apply"> | |
| </Button> | |
| <StackLayout> |
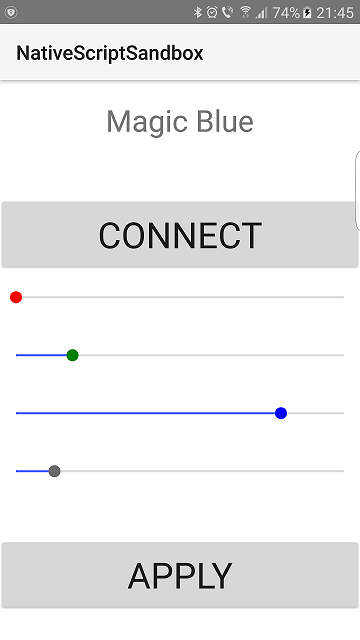
First you specify the stack layout, and then added two buttons, one for each of our actions, four sliders for the color model and a title so you know what the application does :)
The Angular binding syntax work here also, so you can add event handlers with *(tap)=”updateLightBulb()”, *bind to element properties with *[minValue]=”minValue” *and use two way binding with [(ngModel)]=”blueValue”. Angular documentation offers more insights about this if needed.
With some basic styling (can be grabbed from GitHub) the application should look like this:
Interacting with the light bulb
Even though NativeScript offers the option to access all native APIs directly from TypeScript, which is pretty neat, I’ll use a ready made plugin that will interact with bluetooth connectivity.
NativeScript-Bluetooth can be found on GitHub and you can add it to the project using the CLI:
tns plugin add nativescript-bluetoothNext, you can move on, to create some services to help interact with the bluetooth plugin. You can create one as a wrapper for the bluetooth plugin and one to hold the logic related to the light bulb.

A class to hold a bluetooth device properties might come in handy also.
| export class BleDevice { | |
| constructor(public UUID: string, | |
| public name: string, | |
| public state: string) { } | |
| } |
First thing that you need to do is handle the application permissions. For Android this means that inside the AndroidManifest.xml file you’ll add these extra three permissions:
<uses-permission android:name=”android.permission.BLUETOOTH”/>
<uses-permission android:name=”android.permission.BLUETOOTH_ADMIN”/><uses-permission android:name=”android.permission.ACCESS_COARSE_LOCATION”/>
The first two will allow to discover and connect to bluetooth devices, and the last one is needed to access the device location. This is needed for devices running Android 6, where you need the location permission in order to scan for nearby BLE enabled devices.
Moreover, even if they are added, you need an extra step to request for permission at run time in order to be able to scan for devices. You can do this with *requestCoarseLocationPermission *method from the bluetooth plugin:
| fixPermission(): void { | |
| bluetooth.hasCoarseLocationPermission() | |
| .then((granted) => { | |
| if (!granted) { | |
| bluetooth.requestCoarseLocationPermission() | |
| .then(() => console.log("Location permission requested")); | |
| } | |
| }); | |
| } |
You can call this method when the application initialises, to be sure we have the permission from that point on. For example in the OnInit hook of our light bulb component.
Other methods like write, *connect *or *disconnect *from the bluetooth service are just wrappers around the ones from the bluetooth plugin so I could add callbacks with some log messages. You could have, just as easily, used directly methods from the plugin. As a bonus you get an abstraction, the application does not know directly of this plugin, and you could switch it with something else, or with my own implementation by changing only this service.
The last interesting method here is *scan, *where you try to fetch all the devices available and store them:
| scan(): Promise<any> { | |
| return bluetooth.startScanning({ | |
| serviceUUIDs: [], | |
| seconds: 3, | |
| onDiscovered: (device) => { | |
| const bleDevice = new BleDevice(device.UUID, device.name, device.state); | |
| this.bleDevicesAround.push(bleDevice); | |
| } | |
| }); | |
| } |
You’ll use the devices list further on when you’ll try to figure out which one is a smart light bulb.
Hooking up the UI and the light bulb
Use the light bulb command service to interact with the device from the UI components. There will be two essential methods in here, one to figure out which of the devices is magic blue and one to write a message to the light bulb in order to change its color.
A naive approach for detecting the device and just fetch the fist one that has ‘LEDBLE’ in its name works great. After that you need to connect to it, so it will be ready for receiving messages:
| getMagicBlue(): BleDevice { | |
| return this.bluetoothService.bleDevicesAround | |
| .filter(d => d.name && d.name.indexOf('LEDBLE') > -1)[0]; | |
| } | |
| connectToMagicBlue() { | |
| this.bluetoothService.scan().then(() => { | |
| this.magicBlue = this.getMagicBlue(); | |
| if (this.magicBlue) { | |
| this.bluetoothService.connect(this.magicBlue.UUID) | |
| .then((device) => console.log('Connected: ' + JSON.stringify(device))); | |
| } | |
| }); | |
| } |
The second important part here is actually sending a message to the device. Nothing to complicated here, you need to create a message with the correct structure and add data with the correct encoding. Had quite a lot of fun trying to figure out what the light bulb expects but managed to figure it out in the end:
| update(red: number, green: number, blue: number, white: number) { | |
| const color = [86, red, green, blue, white, 240, 170].map(param => { | |
| return this.convertToHexString(param); | |
| }).join(","); | |
| const updateMessage = this.getMessage(this.magicBlue.UUID, color); | |
| this.bluetoothService.write(updateMessage); | |
| } | |
| getMessage(UUID: string, value: string): any { | |
| return { | |
| peripheralUUID: UUID, | |
| serviceUUID: 'ffe5', | |
| characteristicUUID: 'ffe9', | |
| value: value | |
| }; | |
| } |
The message structure is composed from the device identifier and value to be written along with the service and characteristic ids of the device. This is device specific and is retrieved in the *connect method. *Each device can have multiple services with multiple characteristics. Each of them has a set of properties, and if write is specified as true, it means you can write values to it.
The data that you need to write to the light bulb is formed from the RGB colors, along with some (in this case) hard coded values that control other properties of the light bulb. The bluetooth plugin expects data in hexadecimal so we map all elements of the array to that and join them.
Having this done, you can go back to the component and wire up the connect and update methods in there:
| connectToMagicBlue() { | |
| this.lightBulbCommandService.connectToMagicBlue(); | |
| } | |
| updateLightBulb() { | |
| this.lightBulbCommandService.update(this.redValue, | |
| this.greenValue, | |
| this.blueValue, | |
| this.whiteValue); | |
| } |
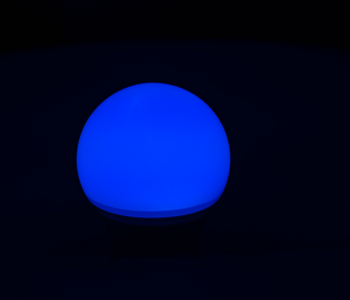
And voilà, you’re controlling the light color :)
Source code
The complete source code can be found in this GitHub repository. It contains a full working solution and some small updates beside what was described above. Have fun coding!